
Some Child Photography Basics
Photo Taking Tips March 1, 2016 Editorial Staff 0

Photographing children is challenging. With kids, everything usually happens way too fast for the camera to capture. Because of that, you can expect to get lots of blurry and out-of-focus photos by the end of the shoot. With kids, there’s also no way you can do formal settings and posed shots. For child photography, you need to adapt your approach and your techniques to match the demand of the moment.
For starters, you have to prepare your gear ahead of the shoot. Set your camera into “Aperture Priority” mode so you can have some creative control over the depth of field. Put the aperture initially at f5.6, then adjust it up and down as you proceed. Set the ISO to 200 or lower if you have lots of light. Keep the shutter speed to 1/200th of a second or faster. Set the “Auto” focus to single point focusing. Use lens with a good zoom capability. Bring along some external flash in case the built-in flash or natural lighting won’t be adequate for certain situations. Shoot in RAW format, instead of JPEG, for easier editing and post-production processing later.
Aside from the gear, it’s also important to pick shooting locations where kids can be at ease. Select at least one that’s outdoor like a park or the beach, another one that’s indoor, say their bedroom or play room, and another one with a fairly simple background where you can make a few attempts at some posed shots. Choose places where kids normally can have fun.
Finally, before the actual shoot, get to know your subject. Work at being a friend to the child. Aim to create a relaxed and casual environment where he or she can simply play and be his or her natural self. Make the child as comfortable as possible with you and the camera in the background. Have some props ready to keep the child entertained long enough for the shoot to complete.
Once done with the preliminary preparations, here are some tips from the experts on how to take great looking child pictures:
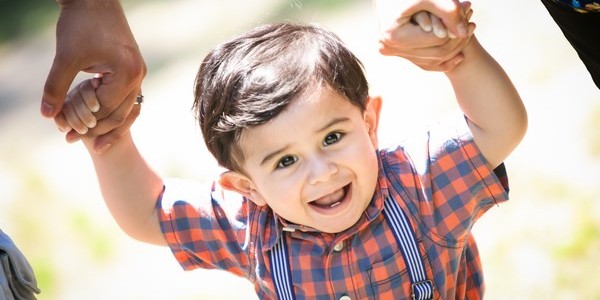
- Take lots of candid shots. As soon as the child looks at you, focus instantly on the closest eye and begin taking pictures. Put your camera on high speed mode and shoot. Kids change facial expressions dramatically every few seconds. If you’re lucky, you may be able to capture on film a few choice ones.
- To get some intimate-looking shots, take pictures at the child’s level, that is, position the camera level with his or her eyes or even slightly lower. On the other hand, you can also get some very interesting images by shooting directly above and below the child’s eye level.
- Pay particular attention to the kid’s eyes. If you’ve got the single zone focusing switched on, choose eyes as the focus point. You can get away with other facial features a little fuzzy but the viewer of an image always is drawn to the eyes of the subject.
- Take note that the background can give context to your shots. Make sure there are no distracting objects behind your subject, no “photobomb” to ruin the picture. For the few posed shots, pick at least as one of your locations a place with an understated background, say one with a plain white wall. Alternatively, light your subject in a way that there will be no background seen in the final photo.
- For parts of the session with child, switch your camera to “Burst” mode. Aim to get a series of shots that will go well together in a multiple image frame on a wall of the child running, sliding down a slide, riding on a swing, doing a dance, biking down a lane, and so forth.
Don’t hesitate to take a couple of experimental, playful abstract shots. With child photography, there’s always a possibility that you’ve actually captured a truly priceless moment. But you’ll know for sure after you’ve got your prints back from your neighborhood Target or Fedex/Kinkos outlet.

No comments so far.
Be first to leave comment below.