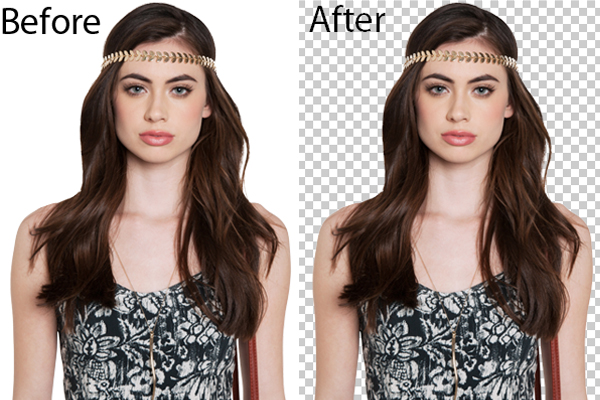

Detaching an Image from its Background Using Photoshop
Photo Print Pictures July 10, 2015 Editorial Staff 0

There are so many things you can do on Photoshop but the common favorite is cutting off an image from the background and transferring to another background. This is so fun to do and when you really get to be good at it, you can cut out your picture flawlessly and incorporate it to any photos of famous places to make it appear as if you’ve actually been there.
You can cut off an image from its background by using the Magic Eraser. When you open your Photoshop, you will find several menus on the left side of your screen. You will find the Magic Eraser as one of the choices when you right click on the eraser menu. Basically what the Magic Eraser does is erase areas by color. If the photo that you want to work on is already open, you can try it out and see how it works.
 Select a spot on the background, take the cursor there and left click. If your cursor was on a spot with a red color, the Magic eraser will erase that area up to the point where it is still red. So, imagine how easy it is to erase the background if you happen to be standing behind a white wall in a photo. You simply have to take the Magic Eraser to that white wall and left click. What will be left is just your image which you can click drag to another photo.
However, this simple process will not work if you are wearing something that’s the same color as the background. Supposing you are wearing a white shirt standing in front of a white background, the Magic Eraser cannot distinguish where your shirt ends and where the background begins and so, it will just erase everything that’s white. In the end all that will be left is a body-less you as your shirt was erased along with the white background.
So, if you are taking a photo with the intention of erasing the background in Photoshop, make sure to stand in front of a background that does not match any of the colors of your skin, hair and clothing. Or if you already have definite background in mind, wear something different from its color.
In case that pre-photography preparation is no longer an option because the picture was already taken, use the Freeform Pen Tool to trace out that part of the background that has the same color as your shirt. The Freeform Pen Tool is the second selection in your Pen menu. Just right click and trace the background to separate in from your shirt. When you have gone around and have reached the point where you started, release the right click and you should see the separation. Left click on the space that you would like to change the color of and select fill. Choose a color that is different from what you are wearing. When the new color of the background has been applied, it should now be easy to erase with the Magic Eraser.
When you have erased the background completely, save that document as a PSD file so that you can easily open that file again whenever you want to use your detachable image. To print these wonderfully creative pictures visit CVS photo.

No comments so far.
Be first to leave comment below.